How to Put Insulation in an Attic: Safe Steps for Homeowners
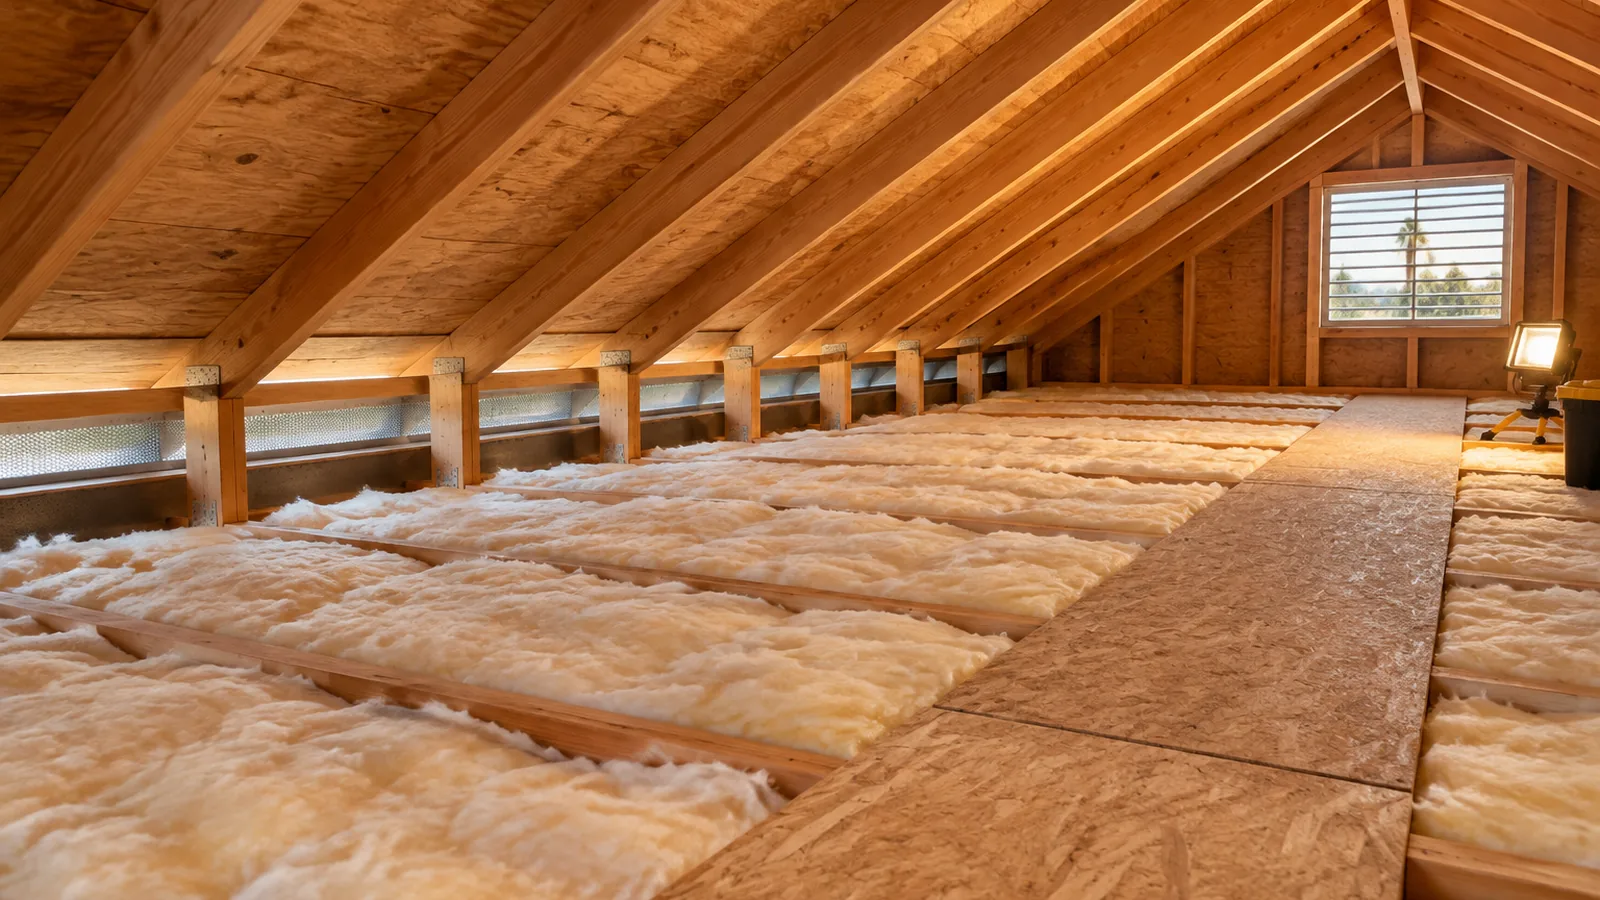
Adding attic insulation can improve how consistently a home holds heat, but a good installation starts with inspection and preparation, not simply buying more material. For Orange County homeowners, the right product and target depend on the house, the project, California requirements, and the manufacturer’s instructions. The steps below cover a practical DIY decision path and the conditions that mean it is time to stop.
If the reason for the project is animal activity, contamination, or damaged insulation, do not treat it as a routine DIY upgrade. Orange County Attic CleanUp & Wildlife Control describes wildlife removal, attic decontamination, and insulation restoration after animal damage.
How to put insulation in an attic: the short answer
Direct answer: Inspect the attic, identify safety and moisture problems, confirm the project’s insulation target, seal suitable air leaks, protect ventilation and heat-producing equipment, then install the selected material evenly without gaps or compression. Finish by checking coverage, the attic hatch, and product documentation. Stop for suspected asbestos, unsafe wiring, moisture damage, unsafe access, or animal contamination.
- Inspect the attic from a safe access point and identify hazards before moving insulation.
- Check current California and local requirements for the specific home and project.
- Resolve leaks and other moisture sources; address suitable air leaks before insulating.
- Keep ventilation paths and required clearances around fixtures and flues unobstructed.
- Install batts or loose-fill according to the product directions and coverage chart.
- Look for gaps, compressed areas, blocked vents, and an uninsulated access hatch.
Is attic insulation a safe DIY project?
It may be manageable when the attic is accessible, dry, adequately lit, and free of unusual materials or electrical concerns. A small job can become unsafe when the floor is hidden by insulation, the roof framing is difficult to navigate, or a homeowner needs to work around wiring, vents, or combustion equipment. Make the go/no-go decision before buying materials.
Stop if you see vermiculite or suspect asbestos
Vermiculite can look like small, lightweight, flaky pieces. The U.S. Environmental Protection Agency advises treating vermiculite insulation as potentially asbestos-contaminated and leaving it undisturbed. Do not rake, vacuum, bag, or cover it as a DIY task. If work may disturb it, contact a trained and accredited asbestos professional. Read the EPA’s guidance on vermiculite attic insulation.
Stop for wiring, moisture, or unsafe access
Do not cover wiring you cannot identify, damaged electrical components, recessed lights with unknown ratings, or a flue or chimney without confirming the required clearances. Wet insulation, roof leaks, mold, rotted framing, and exhaust ducts that end in the attic also need attention first. If there is no stable walking surface, do not step onto ceiling drywall or hidden framing. ENERGY STAR recommends professional help for several of these conditions, including wet materials, poor ventilation, difficult access, and knob-and-tube wiring.
Do not disturb animal-contaminated insulation
Droppings, urine, nesting, persistent animal odor, or chewed materials change the project from insulation work to a contamination and damage assessment. The CDC warns against sweeping or vacuuming dry rodent waste because it can put contaminated particles into the air. Avoid disturbing affected material and get qualified advice, especially when contamination is extensive or may have reached heating and cooling equipment. See the CDC’s rodent cleanup guidance.
Check the right insulation target for your Orange County home
There is no single R-value that should be copied into every Orange County attic project. California’s energy requirements vary by climate zone, building type, and project scope. Use the California Energy Commission climate-zone tool to identify the location, then check the relevant current code and local building department guidance.
The CEC states that buildings with permit applications submitted on or after January 1, 2026, must comply with the 2025 Energy Code. Whether a particular insulation project needs a permit, and which provisions apply, depends on the work and location. The CEC’s 2025 Energy Code page and 2025 Single-Family Residential Compliance Manual resource page are starting points, not a substitute for project-specific review.
For an existing home, note the insulation already present, its condition, and the product label if visible without disturbing it. Check the selected product’s coverage chart and installation instructions. R-value describes resistance to heat flow; it does not by itself determine the correct project target.
Choose between batts, rolls, and blown-in insulation
The shape of the attic, framing, access, and existing insulation all affect the practical choice. This comparison is a starting point, not a claim that one material is best for every home.
| Type | Often suits | Planning considerations |
|---|---|---|
| Batts or rolls | Accessible, regular spaces between framing members | Measure and cut carefully; do not squash the material around obstructions or into ventilation paths. |
| Loose-fill | Irregular areas or spaces that are difficult to fit by hand | Typically needs blowing equipment, consistent depth checks, and care around vents and fixtures. |
| Existing insulation | Attics where material is dry, undamaged, and suitable to remain | Do not cover unknown, wet, contaminated, or suspect material. Confirm compatible layering with the product directions. |
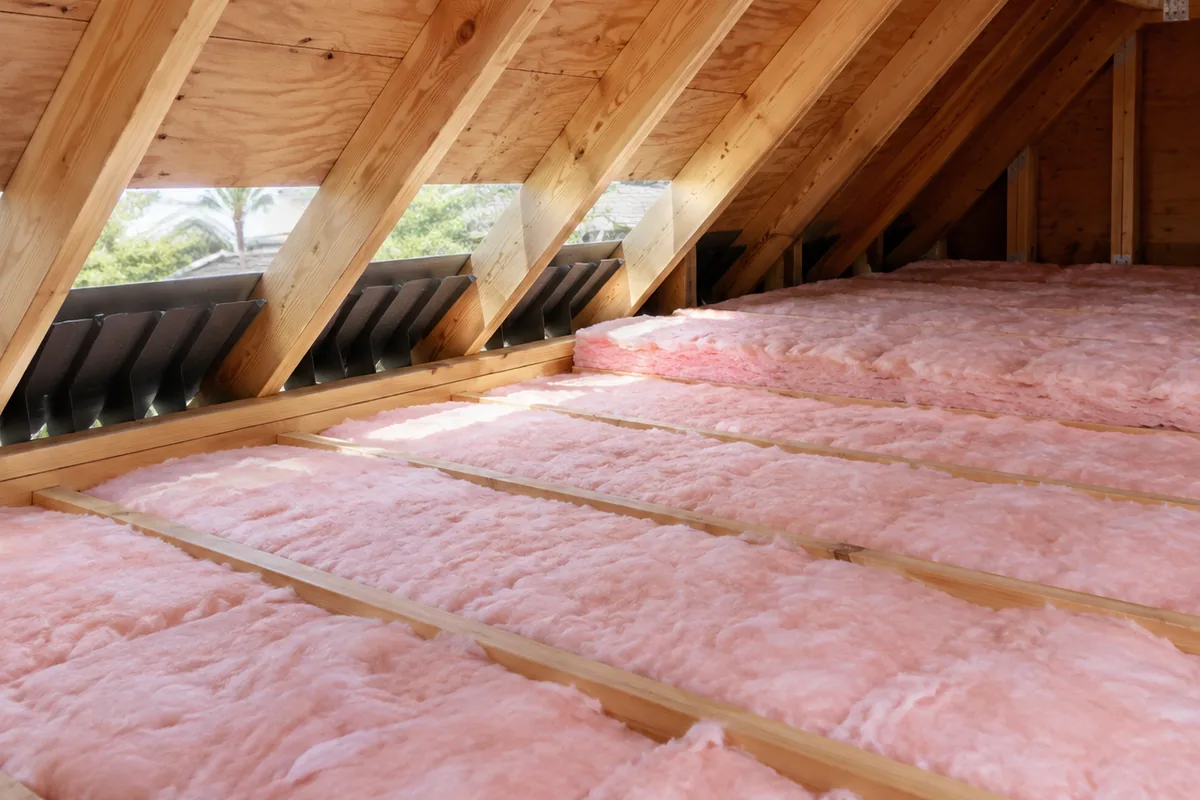
Batts are easier to inspect as you work, while loose-fill can reach around some irregular framing but requires controlled distribution. Follow the product maker’s instructions for combining materials. For example, do not assume a faced batt can be placed over an existing layer; facing and vapor-control details matter.
Gather protective gear, tools, and a material estimate
Before entering the attic, read the product label and gather the supplies it specifies. Common items include gloves, eye protection, a suitable dust mask or respirator as directed, a portable light, tape measure, straightedge, utility knife, and stable boards if the attic requires a walking surface. Wear clothing that covers skin and plan for heat. ENERGY STAR’s attic insulation project guide also stresses safe access, lighting, and caution around nails and fixtures.
Estimate materials from measured floor area and the chosen product’s coverage chart at the specified depth or R-value. Divide the area by the package coverage shown on the label, then account for the layout and obstructions using the manufacturer’s guidance. Do not use a generic online calculator as a code-compliance determination, and do not buy based on an R-value that has not been verified for the project.
Prepare the attic before adding insulation
Address water and air movement first
Find the source of roof leaks or dampness before adding insulation. Insulation is not a repair for water intrusion. ENERGY STAR recommends air sealing before insulation, but electrical work, combustion venting, fire barriers, and work near hot flues may require a qualified professional. Do not use generic caulk or foam around heat-producing equipment; use the correct materials and clearances required for the assembly.
Keep ventilation and equipment clear
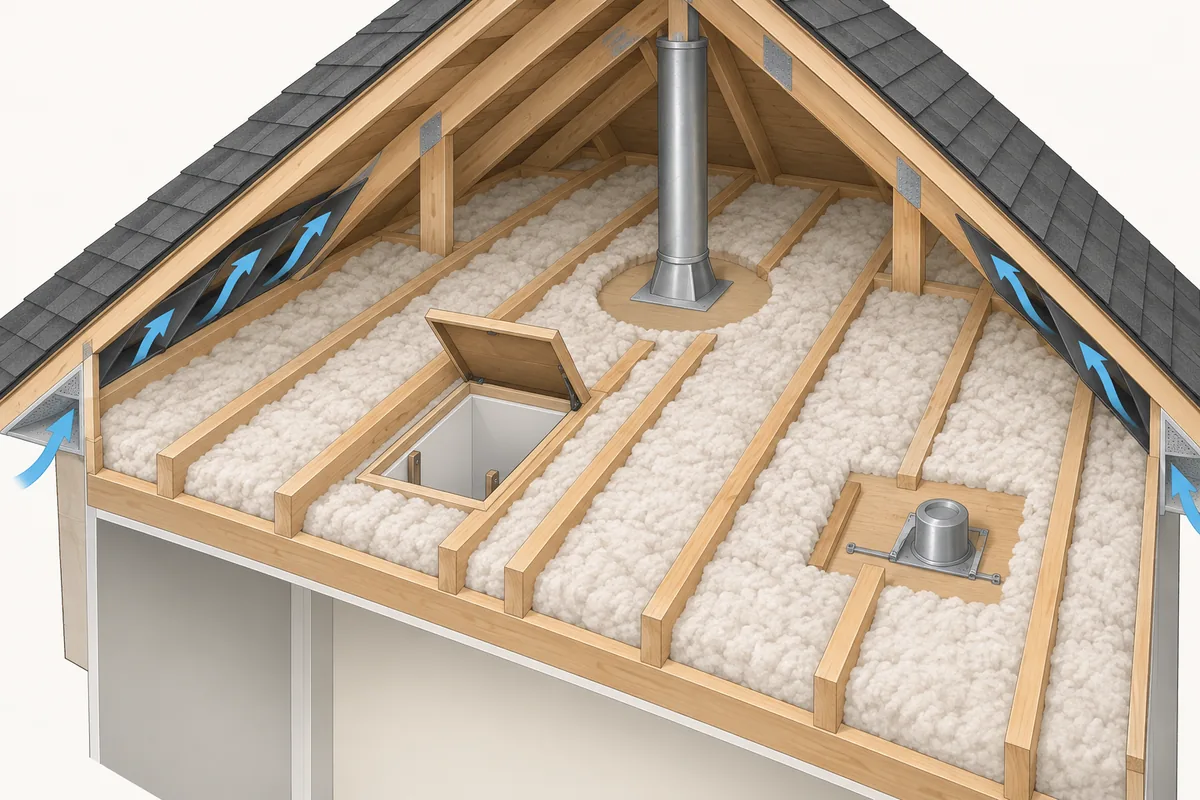
Identify soffit vents and the route air takes toward the roof vents. Baffles can help keep insulation from blocking eave airflow, but the right detail depends on the roof assembly. Mark lights, fans, ducts, flues, wiring, and the attic hatch before installing. Never bury a fixture or obstruct a vent unless the fixture instructions and applicable requirements explicitly allow it.
Also check that bathroom, kitchen, and dryer exhausts discharge outdoors rather than into the attic. If a duct is disconnected, damaged, or routed incorrectly, have it corrected before insulating over the area.
Install attic insulation without gaps or compression
Fitting batts or rolls
Start at the farthest area from the access hatch so you do not have to cross finished insulation repeatedly. Fit each piece to the space without stretching, bunching, or compressing it. Cut around obstructions only when the work is safe and the product instructions allow it; do not push insulation into wiring or cover fixtures, vents, and flues. Follow product directions for any second layer and keep the ventilation path open.
Applying loose-fill
Loose-fill installation requires equipment and a consistent application method. Use the manufacturer’s depth markers or coverage chart for the selected product and keep checking depth as you work. Fill the intended area evenly without piling material over the attic hatch, eave vents, electrical fixtures, or other areas that must remain clear. If you cannot see or protect these features, stop and get help.
For either method, do not walk on insulation or unsupported ceiling surfaces. Stay on safe framing or a properly placed work platform, and leave the attic if heat, dust, or access conditions become difficult to manage.
Inspect coverage and protect the attic access
Before leaving, inspect the work from the access point and from safe walking areas. Look for thin spots, uncovered sections, compressed material, blocked ventilation, and insulation displaced around the perimeter. Check that the hatch or pull-down access is not left as an uninsulated gap. Use the appropriate hatch insulation and weatherstripping method for the assembly, following product instructions.
Take overview photos for your records, save product labels and receipts, and note the material, coverage, and date. These records help with future maintenance and make it easier for a qualified professional to understand what was installed.
Quick checklist before you start
- Confirm the attic is accessible, dry, and safe to enter.
- Stop and seek qualified advice for vermiculite, unknown wiring, damaged fixtures, moisture, or animal contamination.
- Verify the climate zone, project scope, and applicable California or local requirements.
- Choose a product for the attic layout and follow its label, coverage chart, and installation directions.
- Plan how to protect vents, lights, flues, wiring, ducts, and the attic hatch before work begins.
- Inspect the finished coverage and keep product documentation for future reference.
When should you hire an attic professional?
Hire or consult a qualified professional when the attic is hard to access, the existing insulation is wet or suspect, the framing shows damage, ventilation is unclear, wiring or fixtures need evaluation, or the project requires code interpretation. Get an assessment before disturbing insulation that may contain vermiculite, asbestos, or animal waste.
If an animal has left droppings, urine, nests, odor, damaged insulation, or chewed wiring, address the wildlife issue and contamination before adding new material. The client’s verified offer is related to wildlife removal and attic restoration, not general insulation installation. For animal-related attic damage in Orange County, request a free inspection and quote from Orange County Attic CleanUp & Wildlife Control or call (877) 395-6877.
Key Takeaways
- Inspect first: insulation does not fix leaks, unsafe wiring, poor access, or contamination.
- Check the project-specific California requirements instead of relying on one generic R-value.
- Choose batts or loose-fill based on the attic layout, and install without gaps or compression.
- Keep ventilation paths and equipment clear, then inspect the finished coverage.
- For animal waste, nesting, odor, or damaged insulation, stop and arrange a qualified assessment before adding material.
Conclusion: plan the attic before you insulate
Knowing how to put insulation in an attic starts with deciding whether the attic is safe, dry, and suitable for the work. Check the project-specific California target, fix moisture problems, preserve airflow, and follow the selected product’s instructions so the material is not left uneven or compressed. Stop for suspect materials, unsafe wiring, or animal contamination. For wildlife-related attic damage in Orange County, request a free inspection and quote from Orange County Attic CleanUp & Wildlife Control or call (877) 395-6877.
Can I put new insulation over existing attic insulation?
Sometimes, if the existing material is dry, clean, undamaged, and appropriate to remain. Check the selected product’s instructions before layering, including any direction about faced or unfaced material. Do not cover wet, moldy, contaminated, or unidentified insulation, and do not disturb suspected vermiculite. If the condition or material is uncertain, ask a qualified professional before proceeding.
Should I seal air leaks before installing attic insulation?
ENERGY STAR recommends completing attic air sealing before adding insulation. Sealing can improve the overall assembly, but some openings involve electrical systems, hot flues, combustion appliances, or fire protection. Do not improvise around those areas. Confirm the correct materials and clearances with product instructions and a qualified professional when the work is outside your expertise.
How do I keep attic insulation from blocking vents?
Identify the soffit and roof ventilation route before installation, then use the appropriate baffle or blocking detail for that roof assembly. Keep insulation out of the air path and check the perimeter as the work progresses. If you cannot see where the vents are or how air moves through the attic, pause and get professional guidance rather than guessing.
How do I estimate how much attic insulation to buy?
Measure the area you plan to insulate and use the selected product’s package coverage chart at the specified depth or R-value. Account for framing, obstructions, and the manufacturer’s stated coverage method. A package estimate is not a code check: verify the required target separately for the home, climate zone, and project scope.
What should I do if the insulation is wet or moldy?
Do not cover it with new material. First identify and correct the moisture source, such as a roof leak or exhaust duct problem, and have damaged framing or suspected mold assessed. The correct cleanup and replacement approach depends on the material and extent of the problem. A qualified contractor can help determine what needs repair before insulation work begins.
Is it safe to install insulation over rodent droppings or nesting?
No. Do not sweep or vacuum dry rodent droppings or disturb contaminated insulation. The CDC advises that dry cleanup can put contaminated particles into the air and recommends additional precautions for heavy infestations. Arrange an appropriate cleanup assessment before installing new material, particularly if waste or nesting is widespread or reached HVAC equipment.
Does California have one attic insulation requirement for every Orange County home?
No single target should be assumed for every project. California requirements depend on the applicable code, climate zone, building type, and work scope. Use the California Energy Commission’s climate-zone and code resources, then confirm permit requirements and project-specific details with the local building department or a qualified California professional.
Have Questions About Your Attic in Orange County?
Our specialists inspect your attic, identify moisture or rodent entry points, and give you an upfront, no-pressure repair plan.